 Relevancy and Engagement
agclassroom.org/
Relevancy and Engagement
agclassroom.org/
GM Leaf Test Kit
This laboratory activity demonstrates the difference between a conventional soybean plant and a genetically modified Roundup Ready® soybean plant. Students will use a leaf sample from both plant varieties to test for the presence of the CP4 EPSPS protein. Order this kit online from agclassroomstore.com.
Time to Complete
20 minutes
URL
Materials
- 1 conventional/non-GM soybean plant, 1 leaf punch per test
- 1 Roundup Ready®/GM soybean plant, 1 leaf punch per test
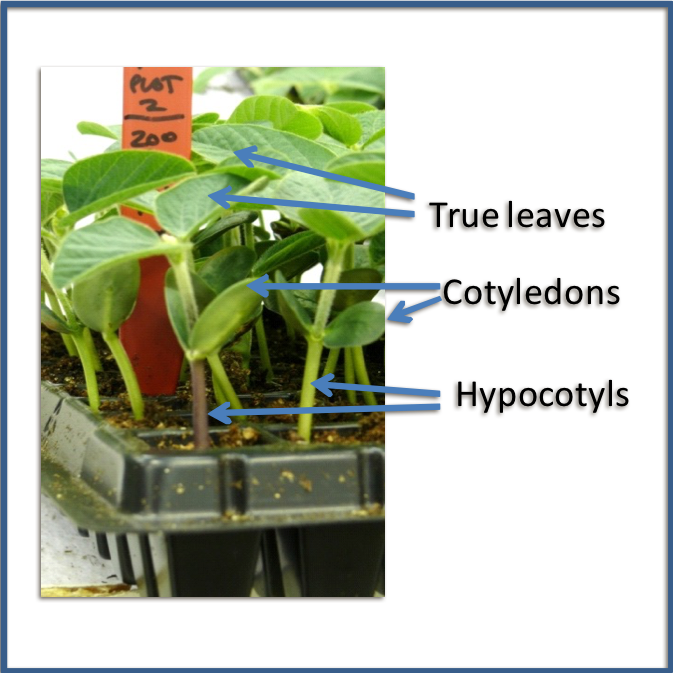
- Note: Leaves used in this laboratory must be true leaves. These develop after the cotyledon or seed leaves which develop first.
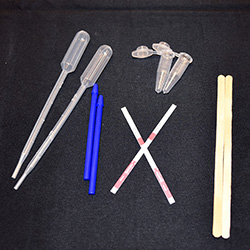
 2 microfuge tubes (1 mL)*
- 2 transfer pipettes or eyedroppers capable of measuring approximately 0.5 mL*
- 2 micropestles*
- 2 stir sticks*
- 2 QuickStrip test strips*
- 1% PBS buffer or distilled water
*These lab supplies are available to purchase in the GM Leaf Test kit.
Procedures
- Label the microfuge tubes for identification of the plant (leaf) that will be tested by labeling one microfuge "A" and the other microfuge "B."
- Obtain 1 leaf from a conventional soybean plant and 1 leaf from a Roundup Ready® soybean plant. Use a true leaf, not a cotyledon (see diagram in Materials section).
- Take a leaf punch using the microfuge tube by placing the leaf between the cap and body of the tube. Close the lid of the tube and tear away extra leaf from around the outside of the closed tube. Allow the leaf punch to fall into the tube.
- Use the micropestle to push the leaf punch into the bottom of the tube.
- DO NOT grind the leaf tissue yet! Over extraction can cause chlorophyll to collect in the test band line of the strip and make it difficult to interpret the results.
- Throughout the lab, use separate tools (micropestle, stir stick, and pipette) for each sample. Cross contamination of the leaf samples will void the test results.
- Use pipette to add ~0.5mL of 1% PBS solution or distilled water into each microfuge tube containing leaf tissue.
- Macerate the leaf (smash up/grind) using the micro pestle until the leaf is broken into pieces. This doesn’t take much. Once you see some green color in the water the sample has been extracted.
- Use the stir stick to mix for 30 seconds. You may also close the lid and shake for 30 seconds.
- Place 1 QuickStrip test strip in each reaction vial with the arrow pointing down.
- Allow test strip to incubate at room temp for 5 min.
- Note: You may see positive results earlier than 5 min, however full incubation time will allow for the negative control to fully develop.
- Interpreting Results:
- A single control line should develop on both tests to indicate a successful test. If it does not, dispose of the strip and retest a new sample with a new strip.
- If the sample contains CP4 EPSPS protein, a second (positive) line will develop.
- If the sample does not contain the CP4 EPSPS protein, a second line will NOT be present on the test strip.
Author
Andrea Gardner
Organization
National Center for Agricultural Literacy
Sources
With permission, this lab activity was adapted by the National Center for Agricultural Literacy from the original lesson packet, Crop Biotechnology: Growing and Testing Roundup Ready Soybean provided by Monsanto.